Today we’re pleased to feature an excerpt from our latest remote pilot textbook, The Complete Remote Pilot, by Bob Gardner and David Ison. Built on the foundation of Bob Gardner’s popular The Complete Private Pilot series, this textbook is tailored for anyone interested in pursuing and obtaining a Remote Pilot Certificate, which is required in order to operate drones for commercial use. The Complete Remote Pilot is designed to not only prepare you for the exam but to teach you about how UAS fly, their components and systems, and the aeronautical knowledge required to fly these systems in the same airspace as large commercial jets. This book covers specifics on the language of drones, regulations, airspace and navigation, airport and off-airport operations, radio communication procedures, weather, aerodynamics and aircraft performance, emergency procedures, human factors, maintenance, and preflight inspection procedures.

REGULATORY REQUIREMENTS
Since an sUAS potentially operates in proximity to and within the same airspace as manned aircraft, a high level of care is required to ensure that the aircraft is safe to operate and will not do anything to jeopardize the ability of the remote PIC to maintain positive control of the system while in use. The FAA explicitly spells this out in 14 CFR §107.15, stating that prior to each flight, “the remote pilot in command must check the small unmanned aircraft system to determine whether it is in a condition for safe operation.” Further, if at any time it is determined that this condition is compromised, the operation must cease immediately. Unmanned aircraft pilots should mimic their manned counterparts who are very familiar with the preflight inspection process, which is (or should be) a very thorough evaluation of the aircraft before taking flight.
While manned aircraft manufacturers typically provide a comprehensive checklist to use for preflight inspections, not all sUAS manufacturers do so. It may be necessary to create your own checklist. However, you may not need to start from scratch—or worse, learn the “hard” way; instead, look online to find out what work has been done on your individual system. Some great resources are available on various websites, especially for systems with minimal documentation provided by the manufacturer. In short, if the aircraft comes with a checklist or procedure for ensuring safe operation, use it. Feel free to add to it if you find some additional things that you feel need to be checked prior to use. If no such guidance is provided, create your own. So what should you include? Let’s take a look.
PREFLIGHT INSPECTION CONSIDERATIONS
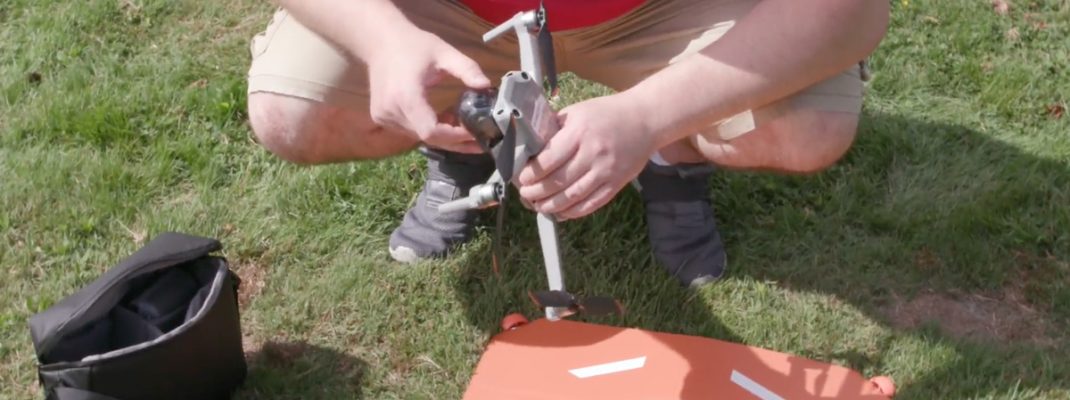
While each sUAS will vary, here are some key areas to consider for careful inspection before flight or on a regular basis. Before every flight, it’s important to do a thorough visual examination of the aircraft. Are there any loose parts? Is anything hanging off that should not be? Does anything look abnormal? Is there any damage to the structure? Next, you should take a look at the propellers. Before putting them on the aircraft, flex the blades slightly to confirm their integrity. While you are doing this, look over the blades and run your finger along their edges and surfaces. If there are nicks or cracks, you should replace the propeller. Once they are installed on the aircraft, propellers should be secure (and locked if applicable), but don’t overtighten them, as that can damage the threads or connections.
While you are in the vicinity of the motors, check them for proper rotation and security. Do they spin freely? Is anything sticking? Are any motors too loose? The best way to know for sure is by comparing one motor to another (or if the sUAS only has one motor, comparing it to how it appeared the last time). If anything is abnormal, it is advisable to remove and replace the item in question. (More experienced users may want to do some bench tests prior to replacing or flying.)
Next, check all peripheral items, such as the camera gimbal or other payloads. Are they properly connected and secured? How about the camera or other sensors? These typically are expensive pieces of equipment; you do not want to accidentally damage or lose them because you were in a hurry to fly.
You will also want to inspect the battery prior to installation. Note: be sure you know the correct power-on procedures for your sUAS. Some will be powered once the battery is installed, so if that is the case, you will want to be ready for that change in status. Typically, the controller is turned on first and then the sUAS is turned on, to reduce the chances of something unexpected happening (and if it does, by following this procedure, you should have control).
Check the battery connection pins/slots to verify that they are not damaged or dirty. Check the body of the battery. Is there any “puffiness” or bulging of the outer coating or sides? If the answer is yes, your battery is failing. Never use a puffy or bulging battery. Is the battery warm or hot? If so, let it cool before using. Do you know the charging status? If not, it is best to know this before flight for quality assurance and performance tracking. Once you are happy with the battery’s status, install it (or position it for installation).
The ground control station and any other equipment also should be inspected. Are the antennae properly installed and attached? Are there any missing or loose parts? What is the battery status of the components? Will the capacity be enough to complete the mission with an additional time cushion?
Is your crew briefed and ready to go? If yes, power on the sUAS (after completing necessary checklists) to check lights and other markings. Do a control check (if possible) and gimbal check. Does everything move freely without abnormal resistance or noises? Next, you will want to do an idle check with motors on (again, only when ready and post-checklists). Check for any unusual noises or vibrations. If any are detected, shut down and investigate further before departing. The final check prior to initiating the mission is an airborne control check. For example, if you’re using a quadcopter, lift the aircraft off to a hover just above the ground. Input left/right, forward/back, yaw, and power inputs to ensure the system reacts as expected. Additionally, confirm that there are no weird noises or “ticks” experienced during this operational check.
POSTFLIGHT INSPECTION CONSIDERATIONS
Upon completing a flight, the sUAS should be inspected again. Essentially you will want to check the same items as in the preflight inspection, noting any changes in aircraft status. Batteries will generally be warm because of discharging, but they should not be hot. Use caution if the battery condition changes between the pre- and post-flight inspections (e.g., it begins to bulge). Note any issues in your maintenance log (explained later) and replace any parts that are damaged or at the end of their service life.