Today’s post comes from Bob Gardner’s The Complete Private Pilot, an excellent resource for anyone working to earn their private pilot license.
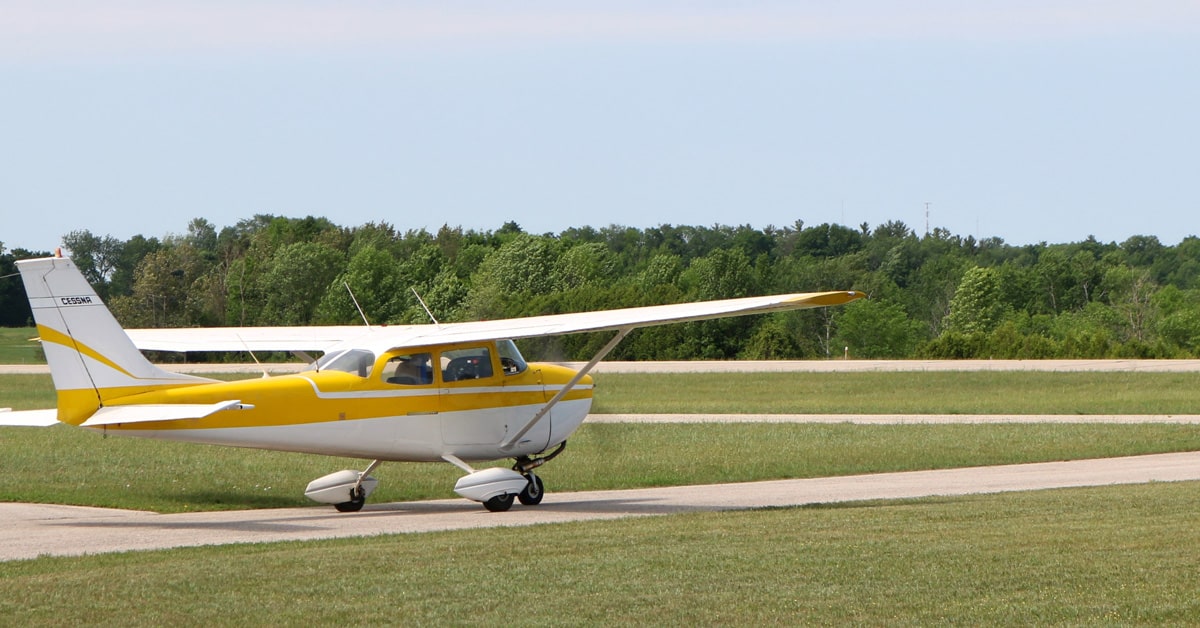
At any airport, you will have to be able to identify the runway in use, taxi safely, be aware of wake turbulence hazards, deal with the line crew, know who (if anyone) controls your actions, interpret lights and markings, etc.
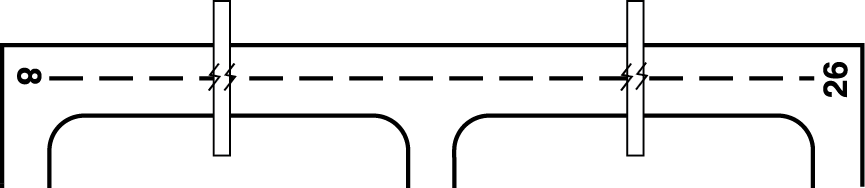
As your flying experience expands to include more airports, you will find some features that they all have in common. For instance, all runways are numbered according to their direction in relation to magnetic north, to the closest 10°. A runway laid out 078° from magnetic north would be numbered 8: rounded off to 080° and the zeros dropped. The opposite end of the runway would be numbered 26, the reciprocal (Figure 1). Some large airports have parallel runways which are identified as left, right, or center: runway 27R, runway 6L, etc. Be sure to set your heading indicator to agree with the runway number before takeoff.
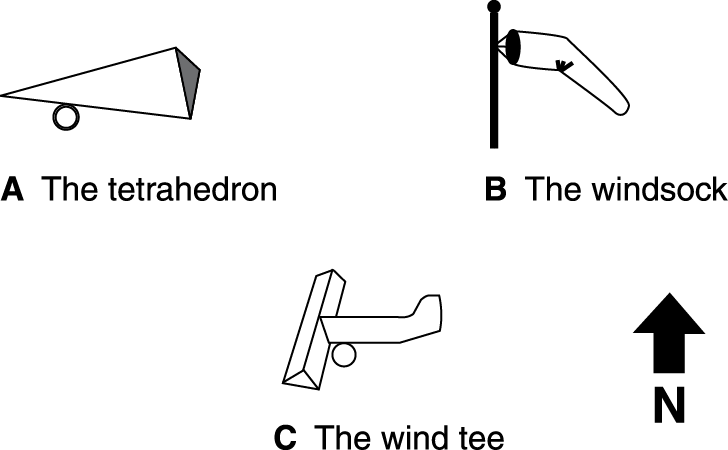
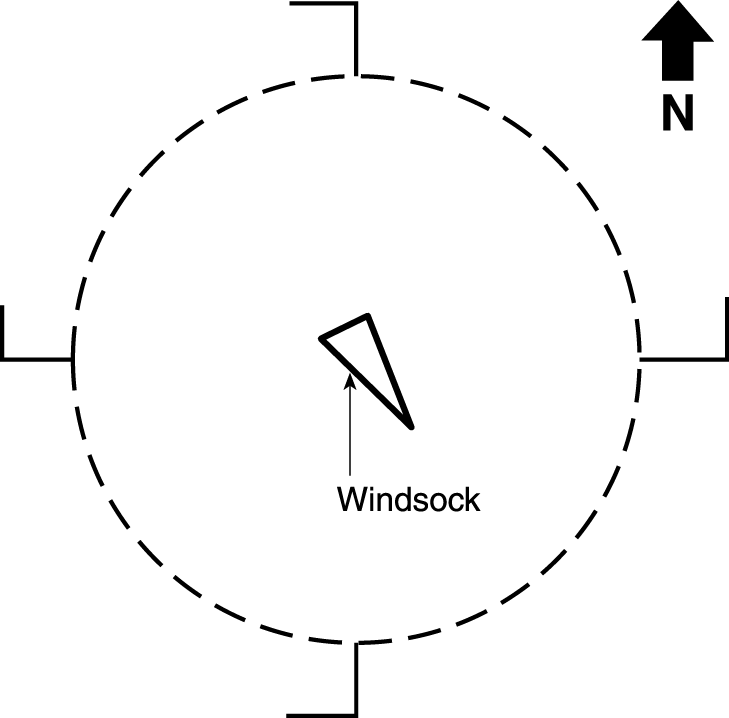
You will normally take off and land into the wind; the wind indicator tells the direction the wind is blowing from. Every airport should have some form of wind indicator or landing direction indicator. Figure 2 shows several types of landing direction indicators: the tetrahedron, the windsock, and the wind tee. All of the indicators in the illustration indicate a wind from the west. Sport pilots must be especially sensitive to wind direction and velocity and the presence of gusts, because light sport aircraft must be flown all the way to the ground, unlike planes weighing more than 1,320 pounds that can “punch through” gusts.
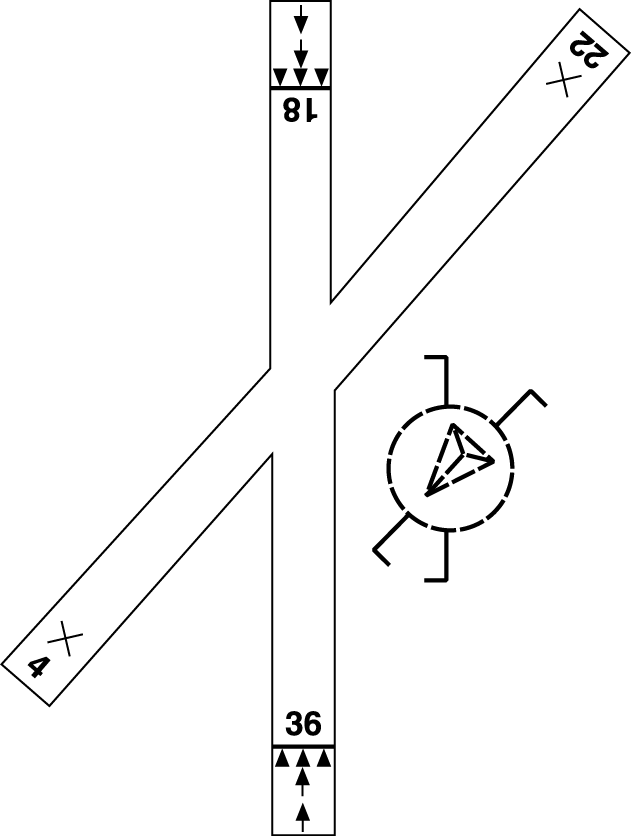
At some airports, the tetrahedron or wind tee may be tied down to show the favored runway and will not accurately reflect wind conditions. Always observe what other pilots in the pattern are doing and conform with the pattern in use; if there are no other airplanes in the pattern it is your choice. Figures 3 and 4 show landing strip indicators and landing pattern indicators—the landing strip indicators parallel the runways and the landing pattern indicators show the direction traffic flows to and from the runways. Your pattern should conform with the traffic flow indicated for the runway in use. See Figure 4.
Although the standard traffic pattern uses a left-hand pattern, frequently terrain or the presence of a congested area dictate the use of a right-hand pattern. Figure 5 shows pattern indicators which keep traffic from overflying the area northwest of the water tank. Where there are no pattern indicators, the regulations require that all turns in the pattern be made to the left. When you fly over an unfamiliar airport and do not see a pattern indicator, you are safe in assuming a left-hand pattern. If an airport requires a right-hand pattern for any runway, the data block on the sectional chart will have a notation such as “RP 11 16,” indicating that runways 11 and 16 have right-hand patterns. If the notation includes an asterisk: *RP 12, the right-hand pattern is in effect only during certain hours—check the A/FD for details.
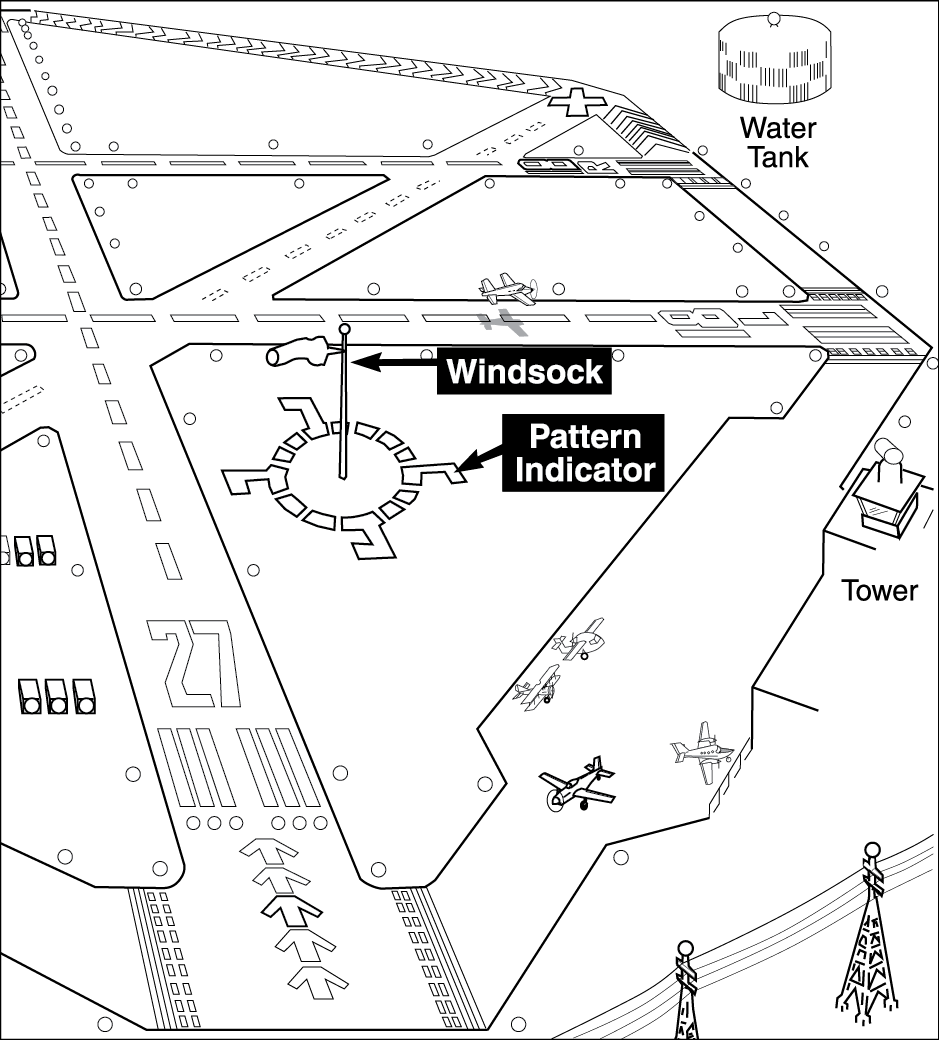
Figure 6 shows the FAA recommended standard left-hand traffic pattern with arrival and departure procedures (note the recommended—not required—45° entry to the downwind leg…but understand that almost everyone uses this entry). If the airport has an FAA required traffic pattern, you must use that pattern (few airports have such patterns —14 CFR Part 93 lists them). Don’t let courthouse lawyers tell you that the right turn onto the downwind leg shown at position 1 in Figure 6 is a violation of the left turn rule—you are not “in the pattern” until you have completed that turn. You should always be at pattern altitude when on the 45; never descend into the pattern.
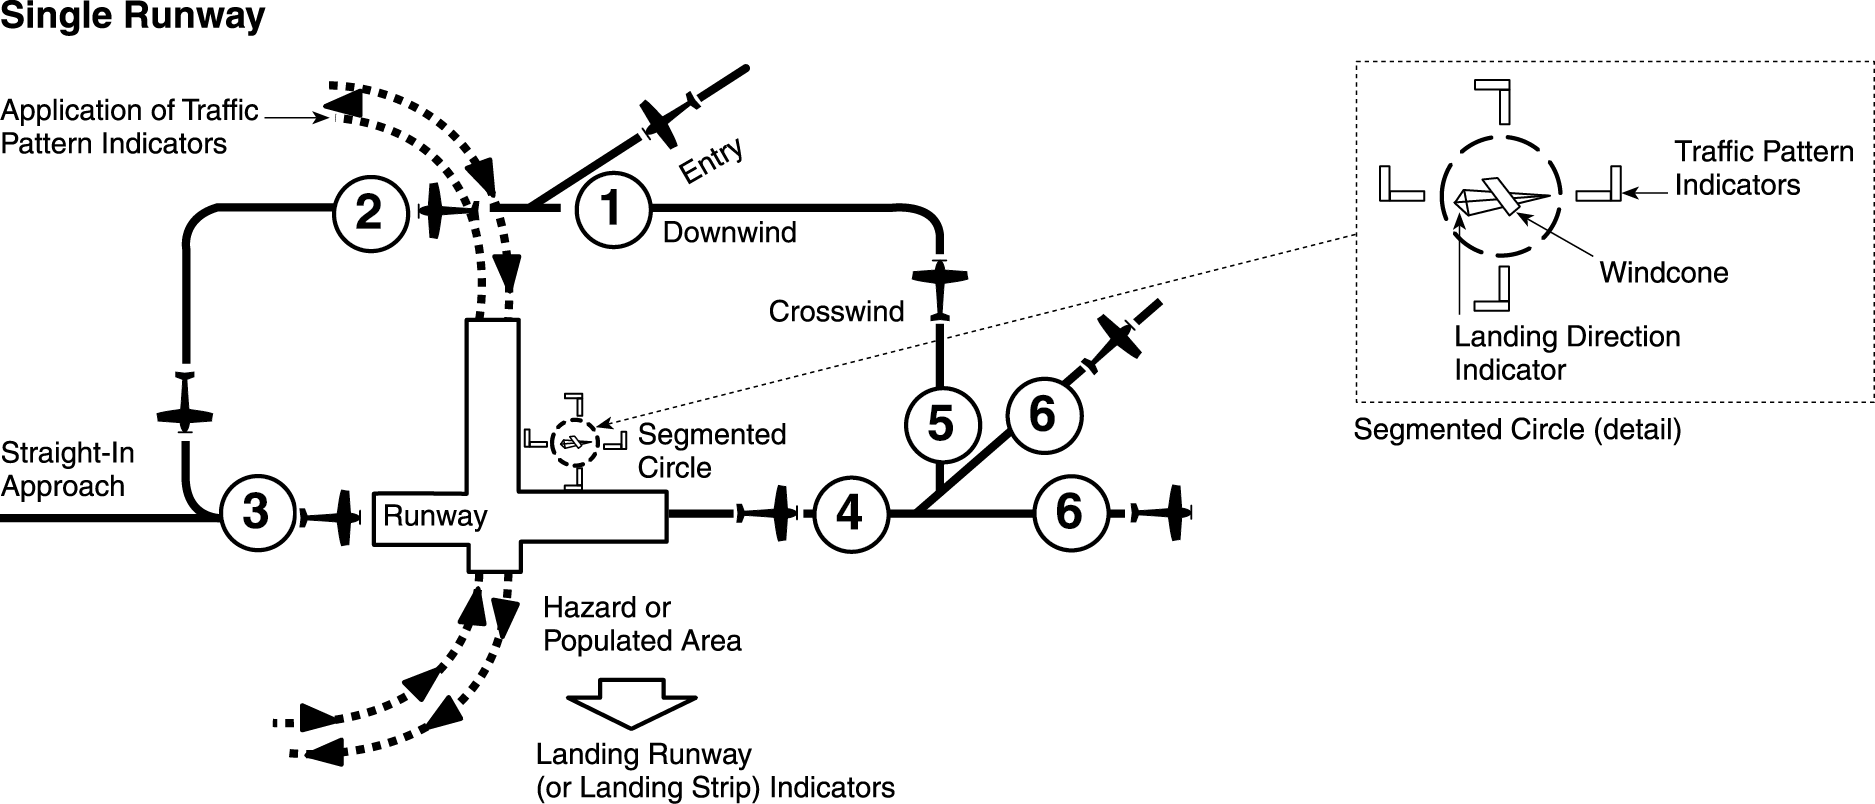
Not illustrated but frequently used is the downwind departure. In the illustration, airplane #’s 5 and 6 are departing in the direction of takeoff…but what if their destination is in the opposite direction? Then they perform (or ask the tower for) a downwind departure. To avoid conflict with airplanes entering the pattern on the 45, pilots performing downwind departures should climb as indicated by plane #5 until well above pattern altitude before turning downwind.
It is an unfortunate fact of life that not all pilots observe recommended procedures. You must be alert to the possibility that another pilot is entering the pattern from a different direction, or straight in—instrument students almost always make straight-in approaches. The instrument runway might not be the one in use by VFR pilots. Listen carefully to the position reports by other pilots, and expect the unexpected.