The success of a flight depends largely on thorough preparation. In the course of your training, a pattern of regular preflight actions should be developed to ensure that this is the case. This includes planning the flight, and checking the airplane. These preflight actions must be based on the checks found in the pilot’s operating handbook (POH), manufacturer’s information manual or the FAA-approved airplane flight manual (AFM) for your airplane. Today we’ll share an excerpt from The Pilot’s Manual: Flight School (PM-1) regarding the preflight inspection of your airplane.
Preparing the Airplane
The information manual for your airplane will contain a list of items that must be checked during:
- the preflight inspection (external and internal);
- the preflight cockpit checks;
- the engine power check; and
- the before-takeoff check.
At first, these checks may seem long and complicated, but as you repeat them thoroughly prior to each flight, a pattern will soon form. It is vital that the checks are carried out thoroughly, systematically and strictly in accordance with the manufacturer’s recommended procedure. Use of written checklists, if performed correctly, will ensure that no vital item has been missed, but some pilots prefer to memorize checks. The comments that follow are only general comments that will apply to most airplanes.
The External Inspection
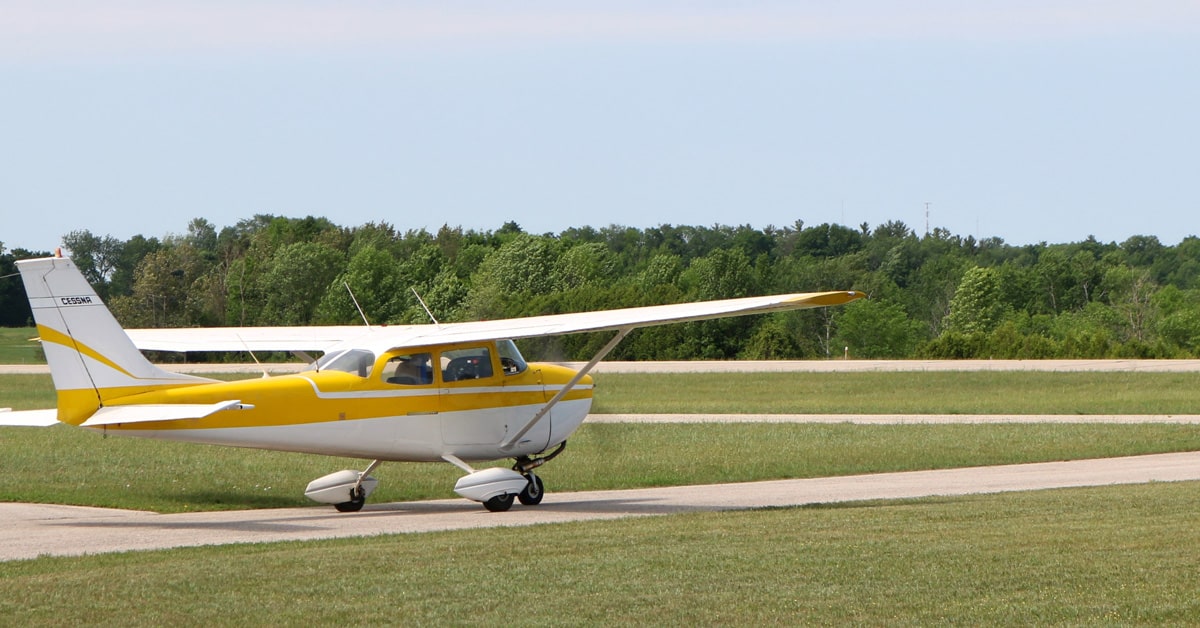
Always perform a thorough external inspection. This can begin as you walk up to the airplane and should include:
- the position of the airplane being safe for start-up and taxi (note also the wind direction and the likely path to the takeoff point); and
- the availability of fire extinguishers and emergency equipment in case of fire on start-up (a rare event, but it does happen).
Some of the vital items are:
- all switches off (master switch for electronics, magneto switch for engine) as a protection against the engine inadvertently starting when the propeller is moved;
- fuel check for quantity and quality (drain into a clear cup);
- oil check; and
- structural check.
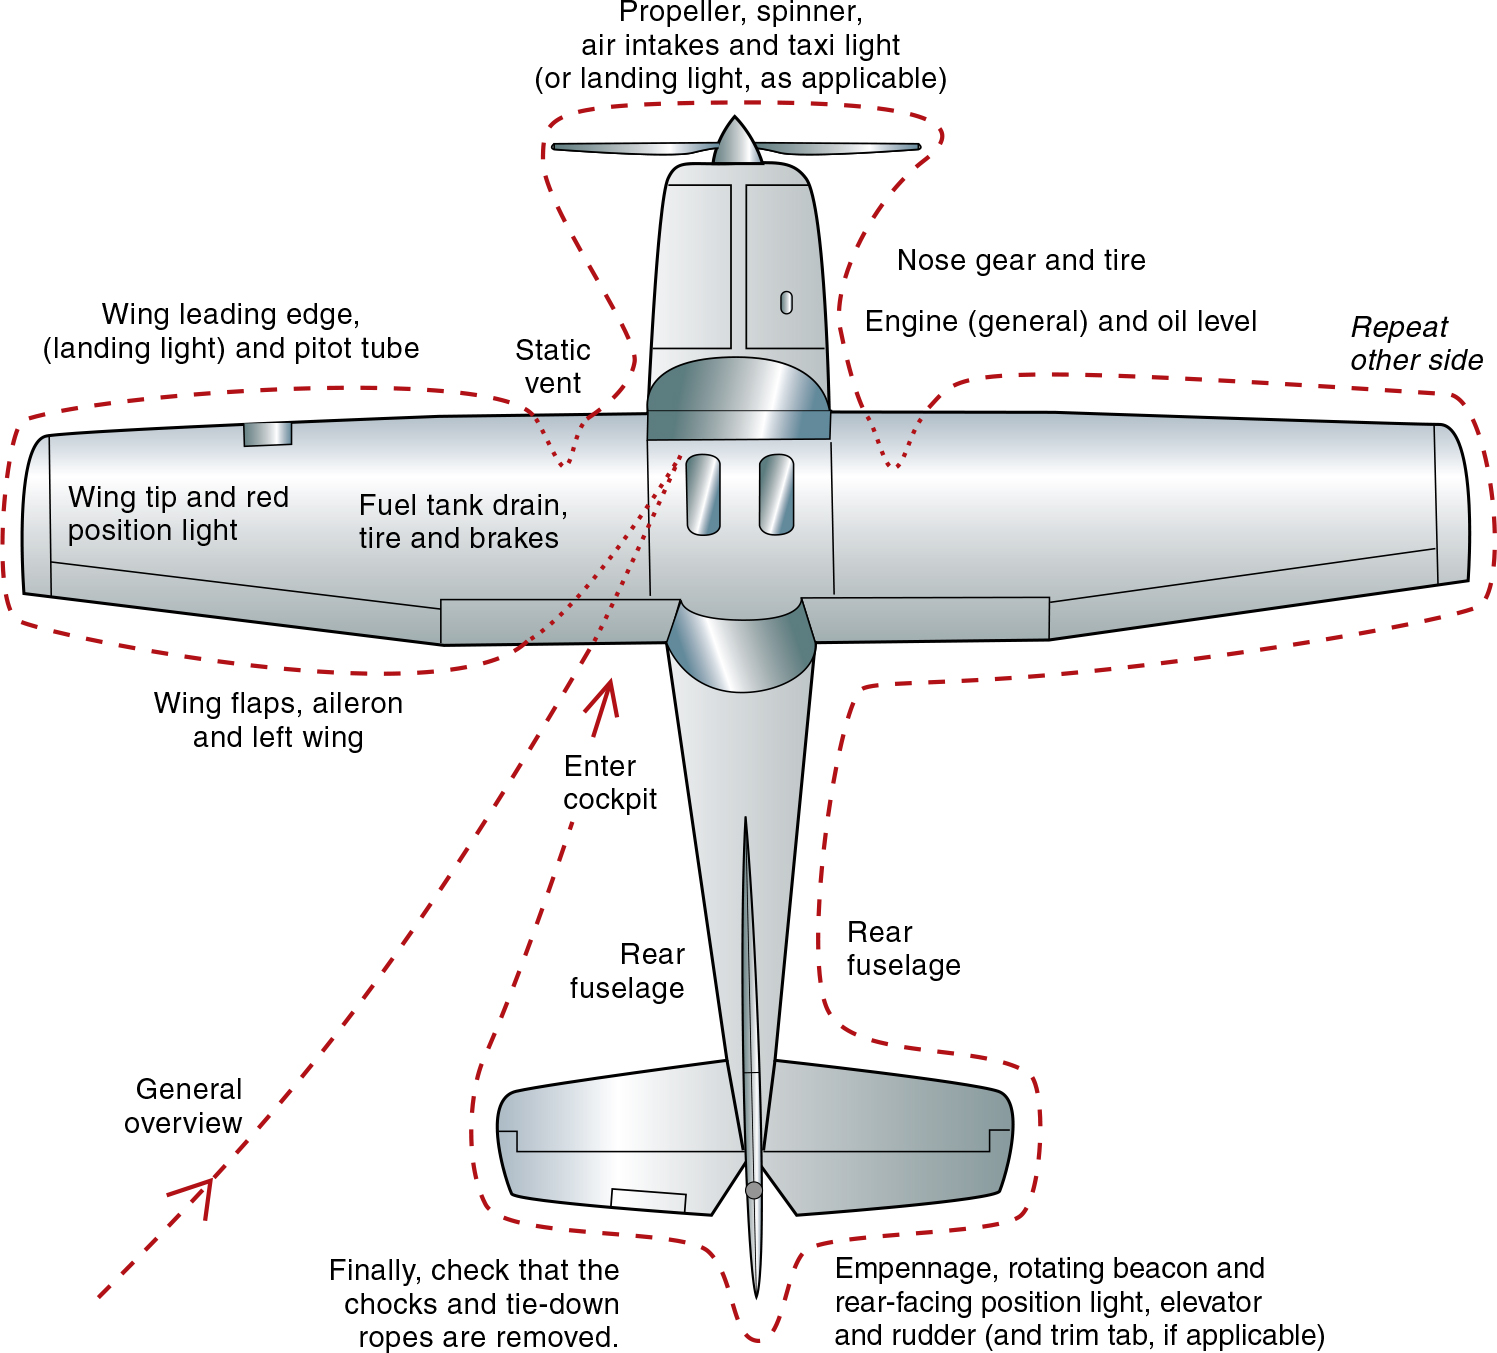
A list of typical walkaround items is shown below. Each item must be inspected individually, but do not neglect a general overview of the airplane. Be vigilant for things such as buckling of the fuselage skin or popped rivets since these could indicate internal structural damage from a previous flight. Leaking oil, fuel forming puddles on the ground, or hydraulic fluid leaks from around the brake lines also deserve further investigation. With experience, you will develop a feel for what looks right and what does not. The walkaround inspection starts at the cockpit door and follows the pattern specified in the checklist provided by the aircraft manufacturer.
Cabin
- Parking brake on.
- Magneto switches off.
- Landing gear lever (if retractable) locked down.
- Control locks removed.
- Master switch on (to supply electrical power).
- Fuel quantity gauges checked for sufficient fuel for the planned flight.
- Fuel selector valves on.
- Flaps checked for operation; leave them extended for external inspection.
- Stall warning (if electrical) checked for proper operation.
- Rotating beacon (and other lights) checked, then off.
- Master switch off.
- Primary flight controls checked for proper operation.
- Required documents on board: MAROW plus airman certificate and medical certificate for the pilot. (Note: under some circumstances a medical certificate may not be required.)
- Cabin door securely attached, and latches working correctly.
- Windshield clean (use correct cloth and cleanser).
Wing
- All surfaces, the wing tip, leading and trailing edge checked for no damage or contamination; remove any frost, snow, ice or insects (on upper leading edge especially, since contamination here can significantly reduce lift, even to the point where the airplane may not become airborne).
- Wing tip position light checked for no damage.
- Flaps firmly in position and actuating mechanism firmly connected and safety-wired.
- Aileron locks removed, hinges checked, correct movement (one up, the other down) and linkages safety-wired, mass balance weight secure.
- Pitot tube cover removed and no damage or obstructions to tube (otherwise airspeed indicator will not respond).
- Fuel contents checked in tanks and matching fuel quantity gauge indications; fuel caps replaced firmly and with a good seal (to avoid fuel siphoning away in flight into the low-pressure area above the wing).
- Fuel sample drained from wing tanks and from fuel strainer into a clear container. Check for correct color (blue for 100LL, green for 100-octane), correct fuel grade, correct smell (aviation gasoline and not jet fuel or kerosene), no water (being denser, water sinks to bottom), sediment, dirt or other contaminant (condensation may occur in the tanks overnight causing water to collect in the bottom of the tanks, or the fuel taken on board may be contaminated).
- Fuel port, or fuel vent (which may be separate or incorporated into the fuel cap) clear (to allow pressure equalization inside and outside the tanks when fuel is used or altitude is changed, otherwise the fuel tanks could collapse or fuel supply to the engine could stop as fuel is used).
- Stall warning checked (if possible).
- Inspection plates in place.
- Wing strut checked secure at both ends.
Fuselage
- All surfaces, including underneath checked for skin damage, corrosion, buckling or other damage (corrosion appears as surface pitting and etching, often with a gray powdery deposit); advise a mechanic if you suspect any of these.
- No fuel, oil or hydraulic fluid leaking onto the ground beneath the aircraft.
- Inspection plates in place.
- Static ports (also called static vents)—no obstructions (needed for correct operation of airspeed indicator, altimeter and vertical speed indicator).
- Antennas checked for security and no loose wires.
- Baggage lockers—check baggage, cargo and equipment secure, and baggage compartments locked.
Main Landing Gear
- Tires checked for wear, cuts, condition of tread, proper inflation, and security of wheel and brake disk.
- Wheel oleo strut checked for damage, proper inflation, and cleanliness.
- Hydraulic lines to brakes checked for damage, leaks and attachment.
- Gear attachment to the fuselage—check attachment, and be sure there is no damage to the fuselage (buckling of skin, popped rivets).
Nose Section
- Fuselage checked for skin buckling or popped rivets.
- Windshield clean.
- Propeller checked for damage, especially nicks along its leading edge, cracks and security (and for leaks in the hub area if it is a constantspeed propeller).
- Propeller spinner checked for damage, cracks and security.
- Engine air intake and filter checked for damage and cleanliness (no bird nests or oily rags).
- Nose wheel tire checked for wear, cuts, condition of tread, proper inflation, and security of nose wheel.
- Nose wheel oleo strut checked for damage, proper inflation (four to six inches is typical), security of shimmy damper and other mechanisms.
- Open engine inspection panel; check engine mounts, engine, and exhaust manifold for cracks and security (to ensure that no lethal carbon monoxide in the exhaust gases can enter the cockpit—exhaust leaks may be indicated by white stains near the cylinder head, the exhaust shroud or exhaust pipes).
- Check battery, wiring and electrical cables for security (firmly attached at both ends).
- Check the oil level; top up if necessary (know the correct type and grade of oil to order); ensure that the dipstick is replaced properly and the oil cap is firmly closed to avoid loss of oil in flight.
- Close the inspection panel and check its security.
Other Side of Airplane
Repeat as appropriate.
Empennage
- Remove control locks if fitted.
- All surfaces checked for skin damage (vertical stabilizer and rudder, horizontal stabilizer, elevator and trim tab); remove any contamination such as ice, frost or snow.
- Control surface hinges checked for cracks, firmness of attachment, safety-wiring and correct movement.
Chocks and Tiedown Ropes
Chocks and tiedowns removed and stowed (after checking the parking brake is on).
Overall View
Stand back and check the overall appearance of the airplane. It cannot be emphasized too greatly just how important this preflight inspection by the pilot is. Even if you have no experience in mechanical things, you must train yourself to look at the airplane and notice things that do not seem right. Bring any items that you are unsure of to the attention of your flight instructor or a mechanic. At this stage, you are now ready to seat yourself in the airplane and begin the internal cockpit inspection.
The Cockpit Inspection
Always perform a thorough cockpit inspection. The cockpit inspection involves preparing the cockpit and your personal equipment for flight. It should include:
- Parking brake set (on).
- Required documents on board (MAROW items).
- Flight equipment organized and arranged in an efficient manner so they are readily available in flight (flight bag, charts prefolded to show your route, computer, pencils, flashlight, and so on).
- Fuel on.
- Seat position and harness comfortable and secure, with the seat definitely locked in position and rudder pedals (if adjustable) adjusted and locked into position so that full movement is possible.
- Ignition switch (magnetos) off (so that the engine is not live).
- Master switch on (for electrical services such as fuel gauges).
- Flight controls checked for full and free movement (elevator, ailerons, rudder and trim wheel or handle). Trim set to takeoff position.
- Engine controls checked for full and free movement (throttle, mixture control and carburetor heat).
- Scan the instruments systematically from one side of the panel to the other for serviceability and correct readings.
- No circuit breakers should be popped nor fuses blown (for electrical services to operate).
- Microphone and/or headsets plugged in (if you are to use the radio) and test intercom if used.
- Safety equipment (fire extinguisher, first aid kit, supplemental oxygen if planning to fly high, flotation equipment for overwater flights) on board and securely stowed.
- Loose articles stowed.
- Checklists on board and available.
- Read the preflight checklist, if appropriate.
Checklists
Normal checklists are found in Section 4 of the typical pilot’s operating handbook, and emergency checklists are found in Section 3. Written checklists are used to confirm that appropriate procedures have been carried out, for example, the before-takeoff checklist or the engine fire checklist. In earlier days, when airplanes were simpler, checks were usually memorized. Nowadays, in more complex airplanes and in a much busier operating environment, many checks are performed with the use of standard written checklists for that airplane. Checklists are usually compiled in a concise and abbreviated form as item and condition (for example, fuel—on), where the item to be checked is listed, followed by a statement of its desired condition. Explanations for actions are usually not included in the concise checklist, but may generally be found in the pilot’s operating handbook if required.
Vital checklists are best committed to memory so that they may be done quickly and efficiently, followed by confirmation using the printed checklist if required. Emergency checklists, such as the engine fire checklist, often have some items that should be memorized, since they may have to be actioned immediately, before there is time to locate the appropriate checklist and read it. These items are often referred to as memory items or phase-one items, and are often distinguished on checklists by bold type or by being surrounded with a box. The method of using checklists may be one of:
- carrying out the items as the checklist is read; or
- carrying out the items in full, followed by confirmation using the checklist.
Be sure to check back Thursday for more on preflight from our CFI as well as something interesting from SunState Aviation!